
How Can We Help?
Users, user groups and user logs
What you will build
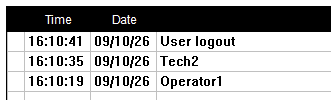
The finished project has two groups, four users, group-protected controls, a login area and an operation log that shows who changed what.
| Group | Users | Allowed to (example) |
|---|---|---|
| Operators | Operator1, Operator2 | Run the machine: start and stop, setpoints, recipe selection |
| Maintenance | Tech1, Tech2 | Everything Operators can do, plus settings screens, log export and log clearing |
Names and rights are examples; replace them with your own. Give each user a unique password and do not keep any default password.
Before you start
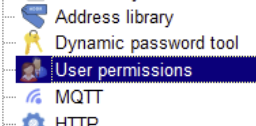
Use User Permission for everything in this tutorial; it is the current user management of CommandHMI
|
 |
Create the two groups
Create the groups first, so they exist when you add the users.
- In the Project Manager, open Setting and double-click User Permission.
- Use Add user group and enter the name
Operators - Repeat for
Maintenance - Leave the default users and groups in place. The software does not allow deleting them.
Keep group names short: the HMI displays the current group through LW63200, which holds 32 characters.
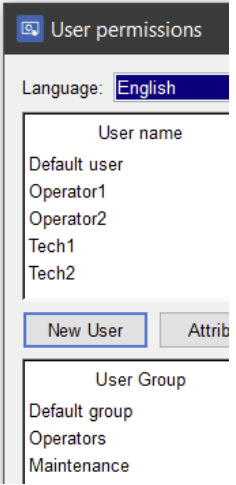
Create the 4 users
Add each user in the same dialog and assign it to exactly one group.
|
 |
Restrict controls by group
Access is set per control (Bit switch, Word switch,..). The Advanced tab decides who can touch it, the Visibility tab decides who can see it.
|
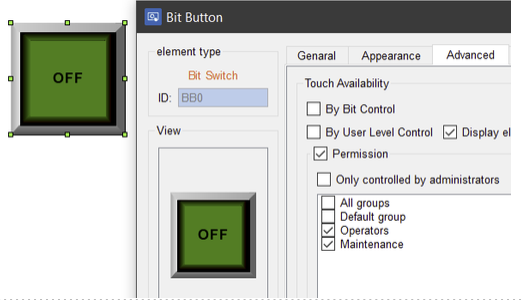 |
Only input controls have this option: bit button, word button, screen button, function button, multi-function button, multi-state button, numeric input, ASCII input, combo box, radio button, stepping button, slider and recipe selector. Display controls can only be hidden through the Visibility tab.
Login, logout and current user display
- Login button : See “Function Button” Log on
- Logout button: See “Function Button” Cancel user login
- View of who is logged in
- Current user name, ASCII Display, Monitor address LW60838, Total 32
- Current group name, ASCII Display, Monitor address LW63200, Total 32
Place these four controls in a header that is visible on every screen; a public screen works well for this.
To log out from a script or from the PLC, set LB60133 to 1. The bit resets automatically once the logout is done.
Configure the operation log with historical log
We are going to use:
- LW1000~1015 : user name to bewrite in log (32 ASCII characters, free-form field, to be adapted)
- LW39900~39915 : copy of the previous user name (free-form field, to be adapted)
- LW60838~60853 : user name of the logged-in user (32 ASCII characters, read-only)
- LB1000 : Trigger for recording events
|
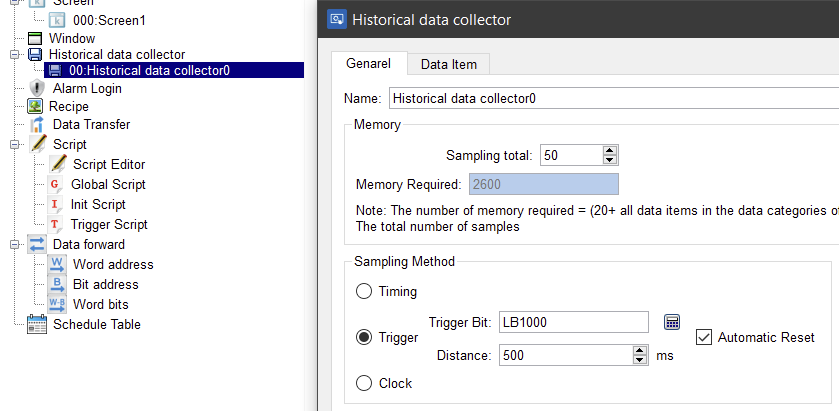 |
The script that will monitor changes to users or log-outs
#include "MacroInit.h"

//#include "subFun1.c" //Example

#define USER_NAME_ADDR	60838	// LW60838~60853 : user name of the logged-in user (32 ASCII characters, read-only)

#define PREV_NAME_ADDR	39900	// copy of the previous user name (free-form field, to be adapted)

#define LOG_TEXT_ADDR	1000	// LW1000~1015 : user name to bewrite in log (32 ASCII characters, free-form field, to be adapted)

#define USER_NAME_WORDS	16		// 32 char = 16 words

void Macro_main(IN *p)

{

MarcoInit

int i;

int changed = 0;

char logoutText[] = "User logout";

// Check if logged user changed

for (i = 0; i < USER_NAME_WORDS; i++) { if (LocalWord[USER_NAME_ADDR + i] != LocalWord[PREV_NAME_ADDR + i]) { changed = 1; LocalWord[PREV_NAME_ADDR + i] = LocalWord[USER_NAME_ADDR + i]; } } if (changed) { if (LocalWord[USER_NAME_ADDR] == 0) { // Logout : empty name -> fixed text

for (i = 0; i < USER_NAME_WORDS; i++)

{

LocalWord[LOG_TEXT_ADDR + i] = 0;

}

for (i = 0; logoutText[i] != 0; i++)

{

LocalWord[LOG_TEXT_ADDR + i / 2] |= (unsigned short)logoutText[i] << (8 * (i % 2));

}

}

else

{

// Login :  copy of the user’s name

for (i = 0; i < USER_NAME_WORDS; i++)

{

LocalWord[LOG_TEXT_ADDR + i] = LocalWord[USER_NAME_ADDR + i];

}

}

// Trigger for recording events

LocalBit[1000] = 1;

}

}
Paste it in New script of the Script Editor, compil it, then call it every 500 ms.

and Add the Historical data display
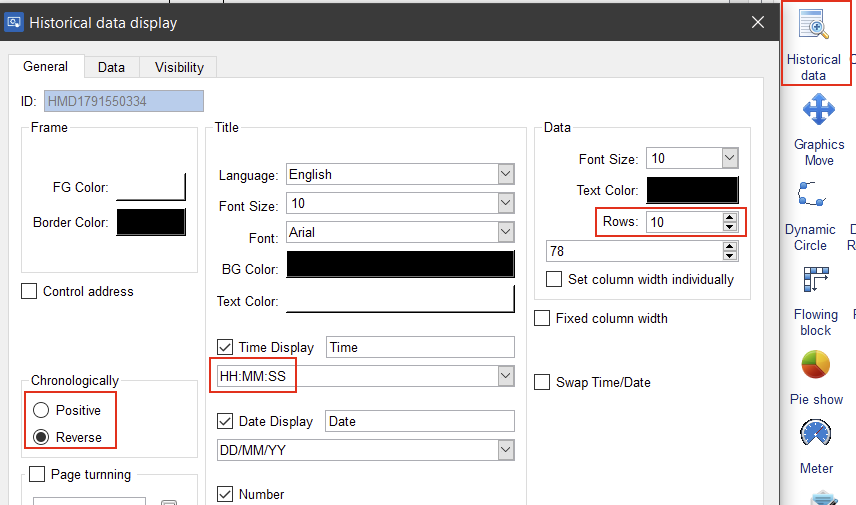
To obtain this:
You can add switch user and log out buttons with bit buttons to test
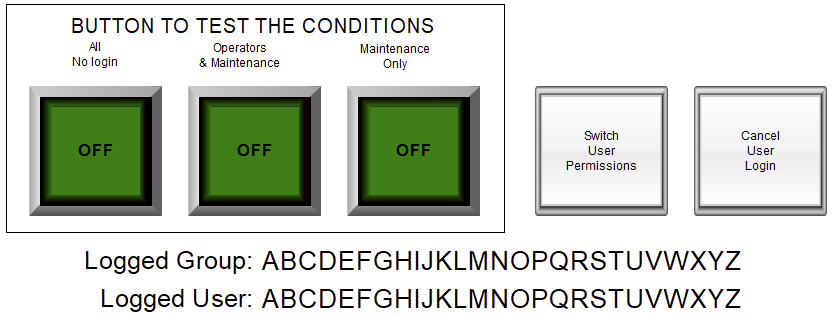
You can dowload the project here