
How Can We Help?
How to install a Cloud MQTT Broker on a VPS (Virtual Private Server)
| This tutorial is useful for setting up a Cloud MQTT Broker on an VPS (Virtual Private Server) for testing and deploying your MQTT projects.
With this type of MQTT broker, you are independent, its availability is 99.99% and its cost is very affordable. You can also chose a ready to use MQTT Broker on Internet or an Android app like MQTT Broker (for testing). |
 |
Test our MQTT Broker
Before you start, you can test our MQTT broker with an uptime of 99.99% (availability)
- Install on your Widnows PC a MQTT Client: MQTT Explorer
- Setup a new connection
- Host = aceautomation.ddns.net or 101b7a0.online-server.cloud
- Port = 1883
- Username = aceautomation
- Password = (Please contact us to obtain it – This MQTT server is a test broker for our customers, not for permanent use)
- Connect !
Select the right VPS from your provider of your choose
The cost of a VPS is approximately 1€ to 4€ /month. You can open an account with Ionos and select VPS cloud hosting.
- Linux (Debian or similare)
- CPU: 1 vCore or more, RAM: 0.5 Go or more, SSD: 10 Go or more
Firewall Policies
Via the Dashboard of your VPS, add the 1883 TCP port for the MQTT Broker

The other ports are there by default. You will need the TCP port 22 for a SSH access. The other ones are not used.
Connect to the VPS Server via SSH
You can use PuTTY as an SSH Client to connect.
Enter your Host Name or IP and 22 as port, and connect.
The login (root or admin ?) and password are those provided by your VPS provider.
Install MQTT Broker
Let’s install the Mosquitto MQTT Broker.
Enter the commands:
sudo apt update

sudo apt install -y mosquitto
The MQTT broker service will start automatically after the installation has completed.
Installation status of Mosquitto Broker
Enter the commands: sudo systemctl status mosquitto for checking the Mosquitto MQTT installation : Ensure the package is “Loaded: …” and “Active: …”
Optional: Test locally the Mosquitto Broker
You can also install the mosquitto client if you wish. This can be useful for testing the MQTT broker on the server itself.
- Enter the commands:
sudo apt-get install mosquitto-clientsand confirm installation - Open a second command-line interface (CLI) using PuTTY
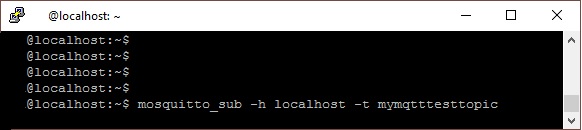
- subscribe to a test topic named “mymqtttesttopic” by entering:
mosquitto_sub -h localhost -t mymqtttesttopic - Then, publish a message from the other terminal:
mosquitto_pub -h localhost -t mymqtttesttopic -m "Sent from my own MQTT Broker" - If the installation is properly working, the subscribe terminal will receive the message:
- subscribe to a test topic named “mymqtttesttopic” by entering:


Stop, Run and Restart Mosquitto
The MQTT broker service started automatically after the installation was completed, but it is useful to know these command, especially after modifying the Mosquitto configuration file:
Stop the MQTT Server service: sudo systemctl stop mosquitto
Start the MQTT Server service: sudo systemctl start mosquitto
Restart the MQTT Server service: sudo systemctl restart mosquitto
Secure the MQTT Server
MQTT Server reads configuration information from the following location: /etc/mosquitto/conf.d
Create a default.conf under the directory:
sudo nano /etc/mosquitto/conf.d/default.conf
You are in text editor. It will maybe ask you for your password for SSH user
Paste the information below to disable anonymous connections and allow Mosquitto to read valid credentials from the /etc/mosquitto/passwd file:
allow_anonymous false

password_file /etc/mosquitto/passwd

listener 1883
- [Ctrl] + [X]
- [Y]
- [Enter] to save the file in /etc/mosquitto/conf.d/default.conf
Add a Password to the MQTT Broker
Replace USER by your username in this commands and execute:
sudo mosquitto_passwd -c /etc/mosquitto/passwd USER
It will ask twice the new password
Restart the mosquitto service to load the new changes:
sudo systemctl restart mosquitto
Connect a MQTT Client
You can use MQTT Explorer as MQTT Client
Host = IP address or DNS host name
Port = 1883
Username = USER you have chosen in the previous section
Password = PASSWORD that you also chose in the previous section
Add multiple users without them being able to see each other’s topics
For each user
Add user2 :
sudo mosquitto_passwd /etc/mosquitto/passwd user2
Creating the ACL (Access Control List) file. This file defines what each user can do
sudo nano /etc/mosquitto/acl_file
Add these lines:
user user2

topic read write user2/#
This allows each user to read and write only to topics starting with their username.
- [Ctrl] + [X]
- [Y]
- [Enter] to save the file in /etc/mosquitto/acl_file
Modifying Mosquitto’s configuration
Edit the main config file:
sudo nano /etc/mosquitto/mosquitto.conf
Add or modify these lines:
allow_anonymous false

password_file /etc/mosquitto/passwd_file

acl_file /etc/mosquitto/acl_file
This tells Mosquitto to use your password and ACL files, and disallow anonymous access.
Restart the MQTT Server service:
sudo systemctl restart mosquitto