
How Can We Help?
How to install Raspberry Pi OS (Raspbian) + Mosquitto MQTT Broker on a RaspBerry Pi
This tutorial is useful for setup a local MQTT Broker for testing our
You can also chose a MQTT Broker on Internet or an Android app like MQTT Broker. |
 |
Install Raspberry Pi OS Lite
Download “Raspberry Pi OS Lite” on raspberrypi.org
Download, install and launch “BalenaEtcher” on balena.io/etcher
Insert your Micro SD-Card in your PC
Flash the “Raspberry Pi OS Lite” on your SD-Card with Balena Etcher
Opening of SSH access
Open “boot” disk/directory of your SD-Card (Re-insert the SD-Card if you can see “boot”)
Add in “boot” an empty text file and name it “ssh”
Setting up a WiFi connection
Add in “boot” a text file and name it “wpa_supplicant.conf”
Open it and write inside:
ctrl_interface=DIR=/var/run/wpa_supplicant GROUP=netdev

update_config=1

country=FR

network={

ssid="SSID"

psk="PASSWORD"

key_mgmt=WPA-PSK

}
Replace SSID and PASSWORD with your own
With RaspBerry
Eject and insert your SD-Card in your RaspBerry Zero
Power on your RaspBerry Zero and wait its connection to your WiFi
Search your RaspBerry IP address on your network (you can use Angry IP Scanner)
Download, install and launch PuTTY for SSH access
SSH connection to your RaspBerry IP address
Login=pi Password=raspberry
Enter the commands: passwd for changing the password of you RaspBerry
Install Mosquitto Broker
Enter the commands:
sudo apt update

sudo apt install -y mosquitto
The MQTT broker service will start automatically after the installation has completed.
Installation status of Mosquitto Broker
Enter the commands: sudo systemctl status mosquitto for checking the Mosquitto MQTT installation : Ensure the package is “Loaded: …” and “Active: …”
Optional: Test locally the Mosquitto Broker
You can also install the mosquitto client if you wish. This can be useful for testing the MQTT broker on the server itself (Raspberry Pi).
- Enter the commands:
sudo apt-get install mosquitto-clientsand confirm installation - Open a second command-line interface (CLI) using PuTTY
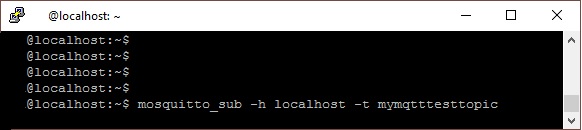
- subscribe to a test topic named “mymqtttesttopic” by entering:
mosquitto_sub -h localhost -t mymqtttesttopic - Then, publish a message from the other terminal:
mosquitto_pub -h localhost -t mymqtttesttopic -m "Sent from my own MQTT Broker" - If the installation is properly working, the subscribe terminal will receive the message:
- subscribe to a test topic named “mymqtttesttopic” by entering:


Stop, Run and Restart Mosquitto
The MQTT broker service started automatically after the installation was completed, but it is useful to know these command:
Stop the mosquitto service: sudo systemctl stop mosquitto
Start the mosquitto service: sudo systemctl start mosquitto
Restart the mosquitto service: sudo systemctl restart mosquitto
Optional: Change the HostName
If you want to change the RaspBerry hostname:
Enter the commands: sudo nano /etc/hosts
With keyboard, replace “raspberry” text by another one (without special characters)
Ctrl+X + Y + Enter to save the file
Enter the commands: sudo nano /etc/hostname
With keyboard, replace “raspberrypi” text by another one (without special characters)
Reboot Raspberry Pi OS
Enter the commands: “sudo reboot” for reboot !
Secure the Mosquitto Server
Mosquitto reads configuration information from the following location:
/etc/mosquitto/conf.d
Create a default.conf under the directory:
sudo nano /etc/mosquitto/conf.d/default.conf
It will maybe ask you for your password for SSH user
Paste the information below to disable anonymous connections and allow Mosquitto to read valid credentials from the /etc/mosquitto/passwd file:
allow_anonymous false

password_file /etc/mosquitto/passwd

listener 1883
Ctrl+X + Y + Enter to save the file
Add a Password to the MQTT Broker
Replace USER by your username in this commands and execute:
sudo mosquitto_passwd -c /etc/mosquitto/passwd USER
It will ask twice the new password
Restart the mosquitto service to load the new changes:
sudo systemctl restart mosquitto
Connect a MQTT Client
You can use MQTT Explorer as MQTT Client
Host = Raspberr IP addres (Use AngryIP to find the IP address of your Raspberry)
Port = 1883
Username = USER you have chosen in the previous section
Password = PASSWORD that you also chose in the previous section
Note: Lifetime of SD cards
The life of SD cards is limited to between 10,000 and 100,000 writes! And your Raspberry Pi OS Lite and MQTT Server work ONLY on this card!
Don’t neglect the quality of the SD card in your Raspberry Pi!
Example of start-up test:
- Samsung EVO 16 GB Card Class (10): 25 seconds
- Unbranded 8GB Class (4): 2 minutes 35 seconds
It is for these reasons that the use of a classic Raspberry in an industrial / production environment is not recommended.
Note: Cloning your SD card
It is important to have a backup of your SD card. In case of failure, you will be very happy to have it 😊